Rate My Setup - The Layman Version
GSoC 2020 [ 0x01 ]
15 Jun 2020Here comes the long deferred post briefing on how to setup for an IIO device driver project. Although my setup is specifically targeted for my GSoC project, I think you’d still get a decent idea on how to proceed with your own one. The final (working) setup is achieved using an Ethernet cable (to share the network of the host laptop) to SSH into Raspberry Pi 3B+ running Analog Devices’ Kuiper OS. VNC server and client is additionaly configured to be able to remotely view IIO Oscilloscope’s GUI from the virtual desktop once we have buffer support for our device.
I put off this post for quite a while simply because I was waiting for my ADXRS290 evaluation board, which apparently is experiencing a ‘clearance delay’ at the Indian Customs office, and I had planned for a blog-post involving a setup with the evaluation board + RPi. Fortunately, I had received my RPi 3B+ a couple of days before the coding period (June 1, 2020) started, after a lot of hassle because of the delivery restrictions due to the ongoing pandemic - I understand its a very privileged statement to say and I’m sincerely grateful for all the people (the delivery staff, employees at Amazon India and countless other brave souls) who made it happen including, of course, my mentors - thank you Dragos and Darius!
The first step is to burn an OS image to your SD card (8GB/16GB) after downloading the image, duh. Raspbian OS, based on Debian Buster, is the most popular choice although I’d be proceeding with Analog Devices Inc.’s (ADI) Kuiper Linux, as recommended by my mentors. The Kuiper distribution is based on Raspbian with its raison d’être being that it serves as a single package for easily interfacing with ADI products via. libiio, IIO Oscilloscope, etc. which are baked into the image itself! I had an informative session with my mentors and Mircea Caprioru from ADI, who is working on the Kuiper distro. They explained how ‘libiio’, with its server-client model and its support for local and network back-ends, can be extermely convenient for our GSoC project (perhaps that can be for another blog-post!). They also presented a demonstration of ‘IIO Oscilloscope’, a ‘libiio’ client with a sweet GUI which captures data from an IIO device’s buffer (again, another blog-post!).
Alright, let’s get them Kuiper (or Raspbian). I recommend using wget, particularly for an unstable internet connection such as mine, instead of the direct browser download because the OS image is ~2.5GB. Do not forgot to use the -c flag to continue from a partially-downloaded file. Replace the link with the latest one available on Kuiper’s wiki or Raspbian’s download page; right-click and press ‘Copy link address’. In my case, I executed:
$ wget -c http://swdownloads.analog.com/cse/kuiper/image_2020-05-06-ADI-Kuiper-full.zip
Unless you have the bandwidth similar to Chuck Norris’, this is going to take a while. This should be a good time to read about the Kuiper belt ;)
Now, unzip the download. In my case:
$ unzip -d kuiper_img image_2020-05-06-ADI-Kuiper-full.zip
ADI also provides checksums on their Wiki to conform your download and unzip process. In my case:
    $ zip_chksum=$(md5sum image_2020-05-06-ADI-Kuiper-full.zip | awk '{print $1}')
    $ img_chksum=$(md5sum kuiper_img/2020-05-06-ADI-Kuiper-full.img | awk '{print $1}')
    $ if [ "$zip_chksum" == "9018cf78e783ae5cdd37a85aa9b0ad64" ]; then echo "[OK]"; fi
    > [OK]
    $ if [ "$img_chksum" == "e98f3beb2928572a5e28bc16807011e8" ]; then echo "[OK]"; fi
    > [OK]
RPi Documentation has an excellent guide to write images to SD cards. Me, a Linux user, followed the guide which uses dd to write the image to my 16GB SD card. Make sure you umount all partitions before copying to the block device (/dev/mmcblk0, in my case) since it might corrupt the writing process if any auxiliary acitivity is going on with it. Also, sync after the write has supposedly been completed to ensure the output buffers are flushed.
If you have a HDMI display (monitor/TV), this should be a good time to check for the integrity of your installation by hooking up your RPi to one.

Hooking up a monitor and the other peripherals (keyboard, mouse) everytime to test isn’t the neatest of solutions. So, we have to turn to other means for interfacing with our RPi. A naive Google search would reveal many such methods: WiFi, USB-UART cable, ethernet cable, etc. Marcelo Schmitt has a brilliant blog describing interfacing options with a mere USB cable and then SSH into RPi or USB-UART serial connection with RPi. I had an ethernet cable lying around at home hence I moved ahead with that to enable remote connection with my RPi via. SSH.
For the sshd (the SSH daemon) to run on your RPi after booting up, one can mount the SD card on your laptop (with an SD card reader), mount the boot/ partition (automatic on Ubuntu) and execute:
$ touch ssh > path/to/boot/partition
There are other ways to enable SSH on your RPi if you have your monitor connected: systemctl:
    $ sudo systemctl enable ssh
    $ sudo systemctl start ssh
or raspi-config to navigate to Interfacing Options > SSH > Yes > Finish:
$ sudo raspi-config
(default password for ‘analog’ user in Kuiper is ‘analog’ and for the ‘pi’ user in Raspbian is ‘raspberry’).
To SSH into the RPi, connect the ethernet cable, enable sharing of the network your laptop is connected to, with your RPi. On Ubuntu 19.10, I executed nm-connection-editor to change to ‘Share to other computers’ under ‘Wired Connections’. Now, all we need is the local IP address of the RPi which is connected to the same network as my laptop with the ethernet cable. Since the local IP address alloted to the devices in a network belong in a specific range, we, first, deduce what our laptop’s local IP address is (provided by the router) and scan through all possible IP addresses around that range to see if any other “hosts” are alive. This question on StackOverflow has crisp answers, in case you’re lost.
    $ myip=$(ifconfig | grep "eno1" -A 1 | grep "inet" | awk '{print $2}')
    $ echo $myip
    > 10.42.0.1
    $ nmap -n -sP ${myip}/24
    > Starting Nmap 7.80 ( https://nmap.org )
    Nmap scan report for 10.42.0.1
    Host is up (0.00067s latency).
    Nmap scan report for 10.42.0.21
    Host is up (0.00051s latency).
    Nmap done: 256 IP addresses (2 hosts up) scanned in 2.43 seconds
10.42.0.21 is the local IP address of the RPi since 10.42.0.1 is my laptop’s ($mypi)! Note that this IP address is alloted to your device, the RPi, is dynamic! The router assigns IP address based on DHCP by acting as a DHCP server. Laymanish, does that mean we run the above sequence of commands everytime to obtain the local IP address of the RPi? Umm, that is actually not required because the router assigns the same local IP address if it recognizes the device by its MAC address, as explained by ItsKiddow in his StackExchange answer. Of course, you can configure your RPi to have a static IP address but, well, my job is getting done (assuming I stick to the same network) :P
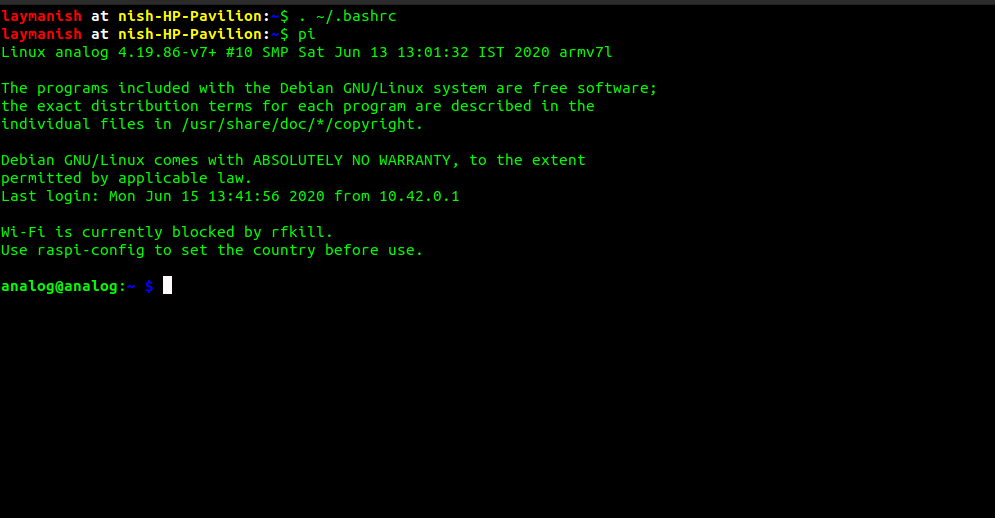
Add the following to your ~/.bashrc for a quick and easy way to SSH into your RPi:
    # ~/.bashrc

    pi() {
            sshpass -p analog ssh analog@10.42.0.21
    }
Source the ~/.bashrc file (or restart your terminal) and ride the SSH bus:
A pivotal point for using Kuiper Linux was to play around with IIO Oscilloscope’s GUI once you have an IIO device with buffer support. So, I thought of setting up a Virtual Network Computing (VNC) server (there are other options such as X11 forwarding with SSH but I found this method easier) on RPi right away and this guide under RPi’s documentation came in handy.
SSH into RPi and execute to install RealVNC, if not already installed:
    $ sudo apt update
    $ sudo apt install realvnc-vnc-server realvnc-vnc-viewer
Then, enable the VNC server using raspi-config: Interfacing Options > VNC > Yes.
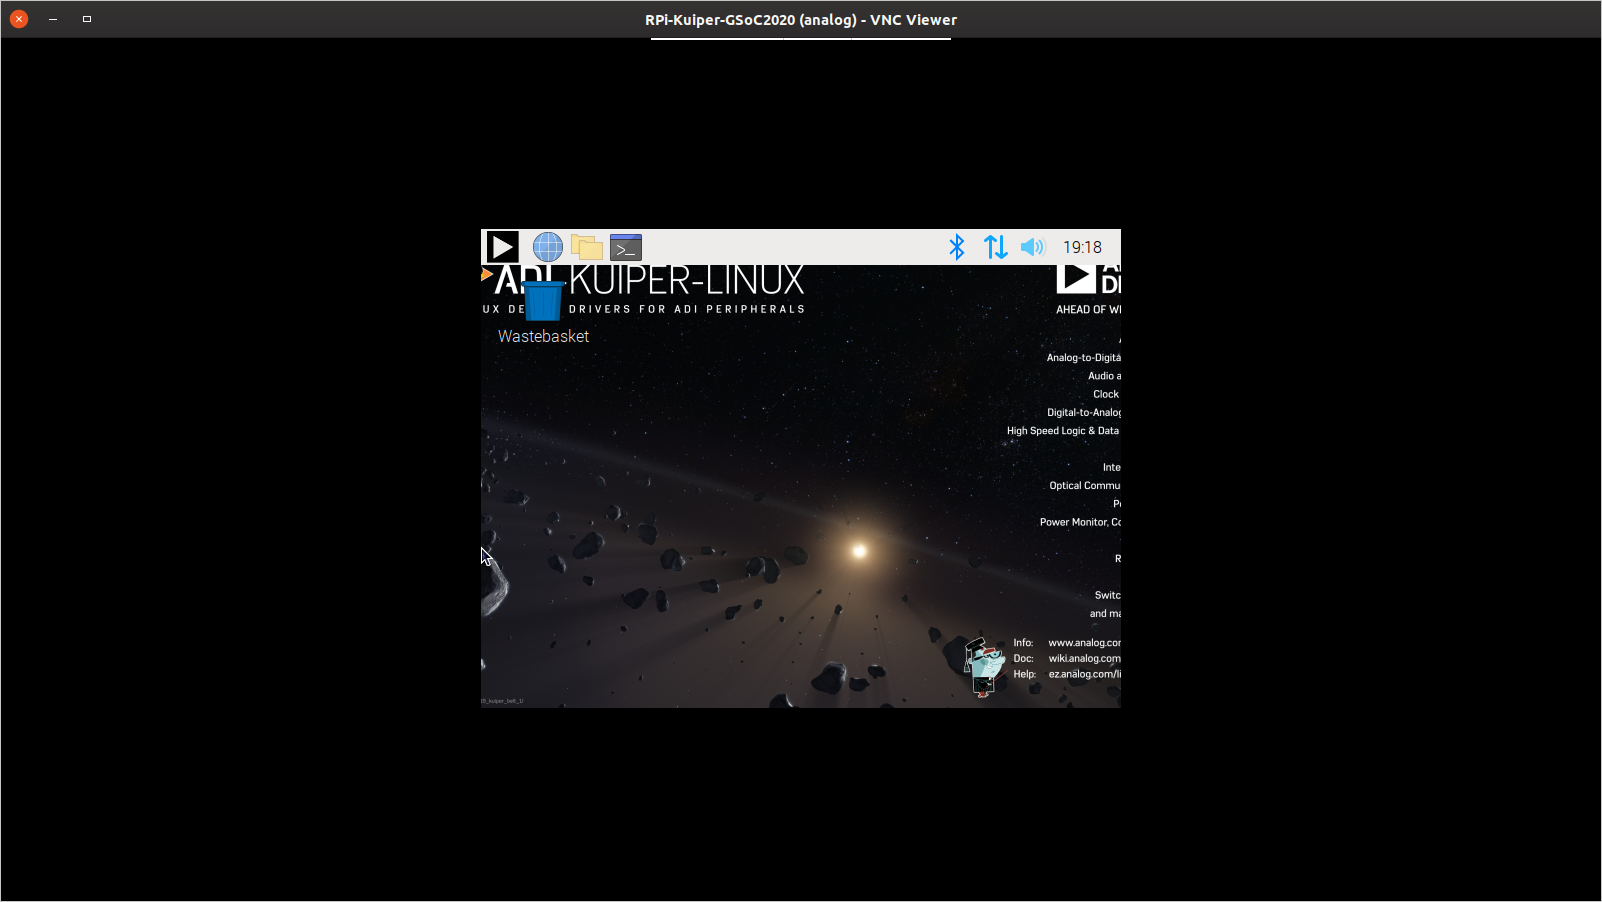
Over to your host, your laptop, install a VNC client. I stationed RealVNC’s Viewer on my Ubuntu after downloading the Debian package. Spawn the viewer and enter the IP address of the RPi which we got previously and bingo!
Huh, the resolution, for me, came to be rather unsatisfactory as it was clipped. Only a sub-region was being displayed. Since my RPi was headless (no HDMI display attached), I spent hours reading how VNC server sets up a virtual desktop to give a graphical remote access and how can one configure the geometry of the virtual display with the config options provided by x11vnc daemon. I tried vncserver:0 -geometry appropriately and restarted the daemon but that didn’t work. I tried creating my own config file: /etc/vnc/xstartup.custom with my required geometry (although I’m not even sure if this is a solution to begin with) but no luck. Similarly, I further experimented my creating a .vncrc config file with the $geometry variable assigned appropriately, as documented in the man pages, but guess what, that didn’t produce the results too.
Ultimately, what worked for me is given in the answer by PeterT in this RaspberryPi forum thread. He suggested to change the HDMI boot options appropriately to modify the x11vnc’s resolution. I don’t really understand how that works but it worked like a charm. What I did:
    # /boot/config.txt

    hdmi_group=2
    hdmi_mode=83
The settings are such for my 1600x900 (hdmi_mode=83) monitor which is defined under DMT (hdmi_group=2). Check out RPi’s documentation on video options for configurating for your own display. Now, restart your RPi and lo and behold:

Striving to make your life much more easier, instead of making efforts for opening VNC viewer, typing the IP address of your RPi, confirming the password and so on, one can setup a vnc config file defining this connection. My rpi.vnc config file:
    # rpi.vnc

    ConnMethod=tcp
    FriendlyName=RPi-Kuiper-GSoC2020
    FullScreen=0
    Host=10.42.0.21
    Identity=000008008f2109ad377aadf97e34a8b363a6d3ee0cfbfc0ce56a02691a817aafc83ff1a42821461c3e833f0c12ad3fc44c581dfe7de02493312e78758df47f8726a4cb29c12d916580756c25774fac6117edecf21941215c9ee30a73cc833d801b6bcf2f402cde52348fe9700a5c7073d0e2c95590be0373931839589e96e748b1b77f5e63868a4230aec24d16c2a30a3472f912878e492562e6834ab204ce909371bebb960ad287cbf3182aa19fa5d8e4683e088d16425f63519615e2d8e3437547528cfe4eb9a8b2fc39a99cc8454fea9c9d2639d648912a08ec31554cc71d0b4650fd053950bd1157e38d17eca17576161da612911aec1046d1a691c774f190b8739b00000000000000000000000000000000000000000000000000000000000000000000000000000000000000000000000000000000000000000000000000000000000000000000000000000000000000000000000000000000000000000000000000000000000000000000000000000000000000000000000000000000000000000000000000000000000000000000000000000000000000000000000000000000000000000000000000000000000000000000000000000000000000000000000000000000000000000000000000000000000000000000000000000000000000000000000000000000000000000000000000000000000000000000000000010001RelativePtr=0
    Scaling=100%
    UserName=analog
    Password=f1e7d865f83bced9
    Uuid=e4ece8ac-38d6-49ca-98e7-74a539f851c5
I got these properties from a ~/.vnc/ViewerStore/*.vnc file after making my first connection with the VNC Viewer’s GUI. The Password property contains the hashed version of the deafult password ‘analog’ which I got from ~/.vnc/config.d/vncviewer.d/passwords.json after making the first connection by typing the password from the GUI.
Finally, add this to your ~/.bashrc and entice your lazy ass:
    # ~/.bashrc

    vncpi() {
            vncviewer -config ~/rpi.vnc &
    }
Source your ~/.bashrc (or restart your terminal) to VNC into RPi by executing vncpi.
So, with this whole exercise, we now know XKCD was right :P

Bonus:
My setup at home for GSoC 2020 until I go back to my mechanical keyboard and my lovely Benq 24” monitor, waiting for me in my college hostel:
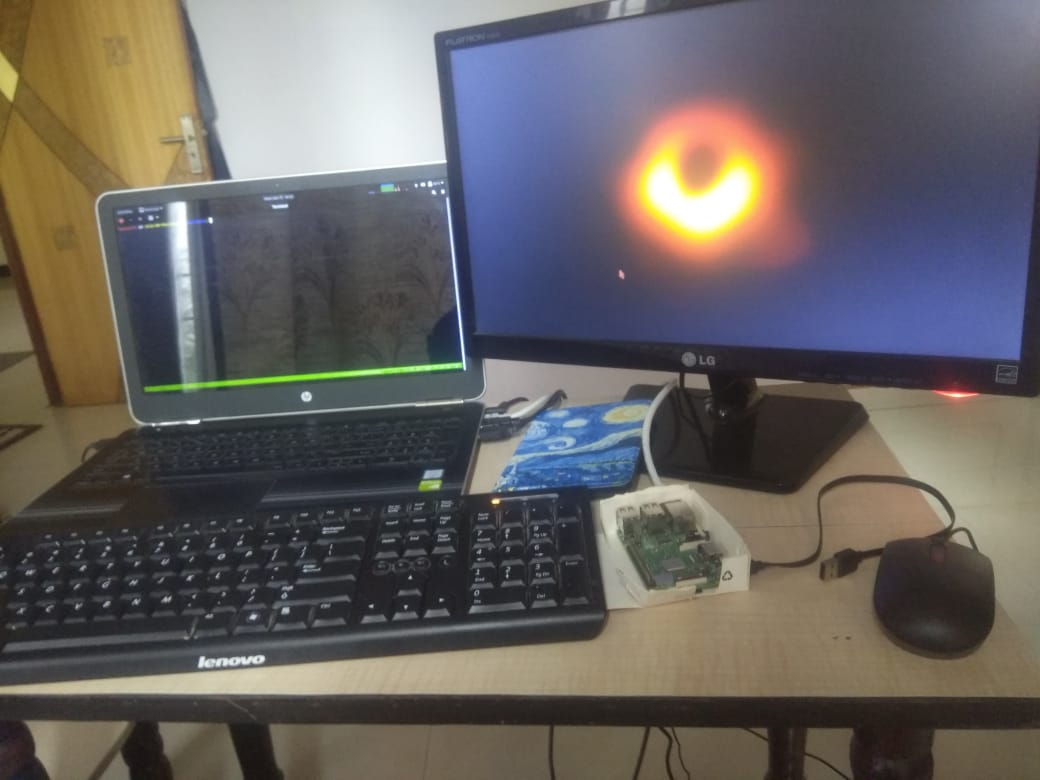
Includes “vintage” peripherals acquired after looking through scrapes in the store room and my All-New Kindle 10th Genertation with a Starry Night cover.